
Table of Contents
- Getting Started
- Introduction
- Possibilities
- Tools Needed
- Channel-Specific Data Variable
- Navigate to Data Storage:
- Variable Details
- Creating Temporary Voice Channels
- Access the Custom Events Module
- Initiate a New Custom Event
- Select the Event Type
- Set Conditional Logic
- Configure the 'Create a Channel' Block
- Temporary Functions
- Update User Count
- Get channel API
- Comparison Condition
- Run Equation on Variable
- Deleting the Channel When the Count Reaches 0
- Access the 'Custom Events' Module
- Initiate a New Custom Event
- Select the Event Type
- Set Conditional Logic
- Update User Count on Leave
- Check the count
- Delete the Channel
- Voice Channel Switch Event
- Conclusion

Do not index
Getting Started
To get started, you must first have created a Discord bot on BotGhost. If you have not created a bot before, follow this guide before proceeding.
Introduction
Managing voice channels on your Discord server has never been easier with BotGhost's custom events, learn how to make a Temporary Voice Channel system. This innovative system automatically generates temporary voice channels when users join a designated "master" voice channel or issue a specific command. It also automatically deletes these channels when they become empty. In this guide, we will walk you through the process of setting up this feature to streamline your server's organization and enhance the user experience.
Possibilities
Imagine the possibilities of having a Temporary Voice Channel system on your Discord server. You can use it for various purposes, such as setting up a support chat system. When a user enters a master voice channel to initiate a voice ticket, they are seamlessly moved to a dedicated voice channel, specially created for them to await support. This approach keeps your server channels tidy and well-organized, ensuring smoother and more efficient voice chats with your community.
Tools Needed
Before we begin, let's make sure you have the necessary tools:
Channel-Specific Data Variable
To create an efficient Temporary Voice Channel system, you'll need to set up a channel-specific data variable in BotGhost's 'Data Storage' module. This variable will serve as the foundation for tracking user interactions within the channel and managing it effectively.
Navigate to Data Storage:
Access the 'Data Storage' module at BotGhost Data Storage.
Variable Details
Define the specifics for your data variable as follows:
Name: user_total
Variable Type: Channel
Channel Data Type: Number
Default Value: 0
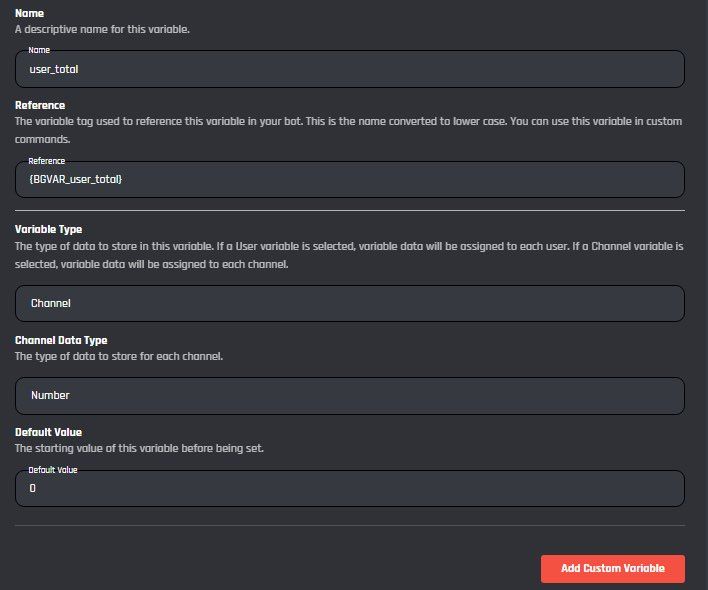
Your data variable settings should match the configuration provided above. Be sure to click 'Add custom variable' to save the data variable. You will use this variable to keep track of the number of users in the voice channels.
Creating Temporary Voice Channels
Now, let's move on to creating the temporary voice channels. We will achieve this using BotGhost's 'Custom Events' module.
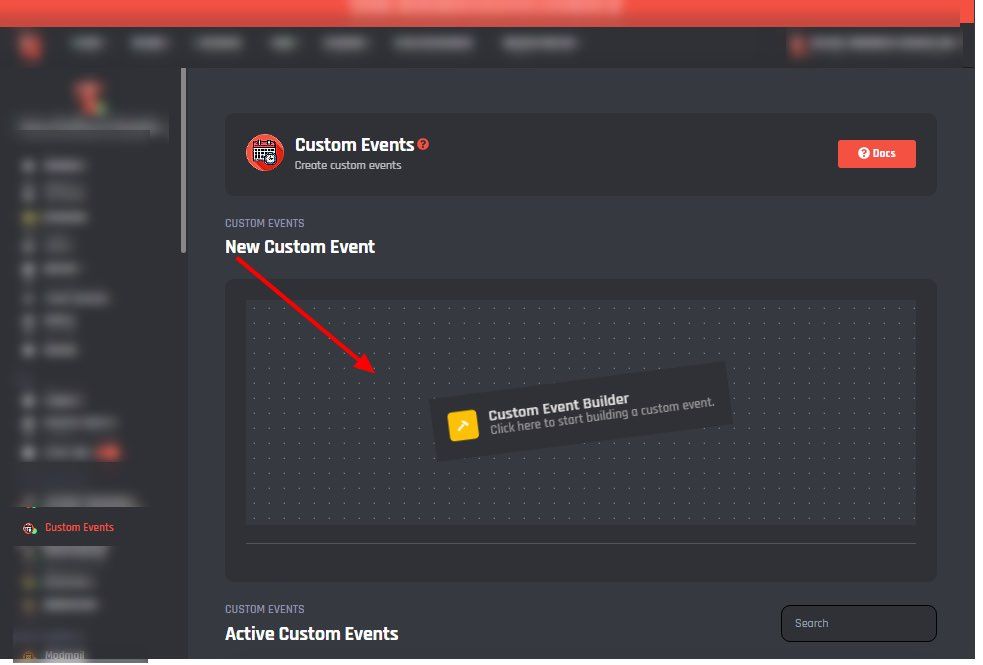
Access the Custom Events Module
Return to the main dashboard page and go to the 'Custom Events' module at BotGhost Custom Events.
Initiate a New Custom Event
Click on the 'New Custom Event' box to open the event builder.
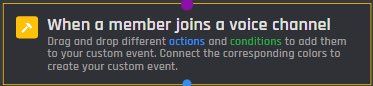
Select the Event Type
In the event builder, choose 'When a Member Joins a Voice Channel' from the event type list. This event type will trigger the creation of temporary voice channels when users join the designated voice channel.
Set Conditional Logic
To create a new voice channel only under specific conditions, set up conditional logic with the following settings:
Base Value: {event_channel_id}
Comparison Value: (Your voice channel ID)
Comparison Type: Equals To
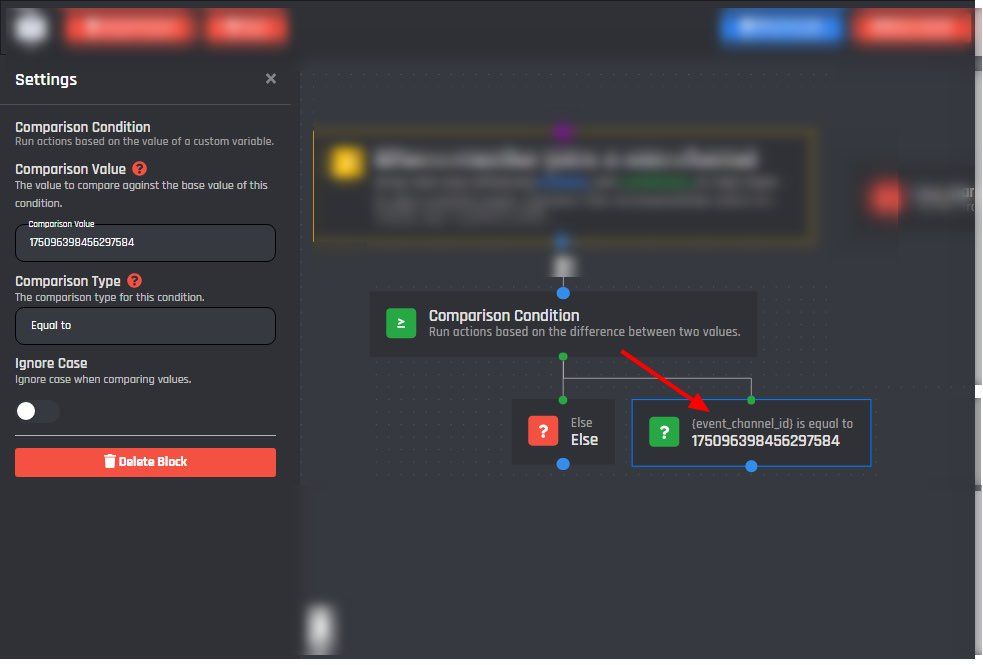
Your comparison condition settings should resemble the configuration provided above.
Configure the 'Create a Channel' Block
Add a 'Create a channel' block below the channel ID condition. Configure it as follows:
Required Settings
Name: {user_displayName}-Temp
Type: Voice Channel
Optional Settings
Category (optional): (You can specify a voice channel's category ID here)
User Limit (optional): (Set a maximum number of users who can join the voice channel, if desired)
Permissions (optional): (Specify permissions to restrict the voice channel to specific users or roles; not editing permissions will default it to public)
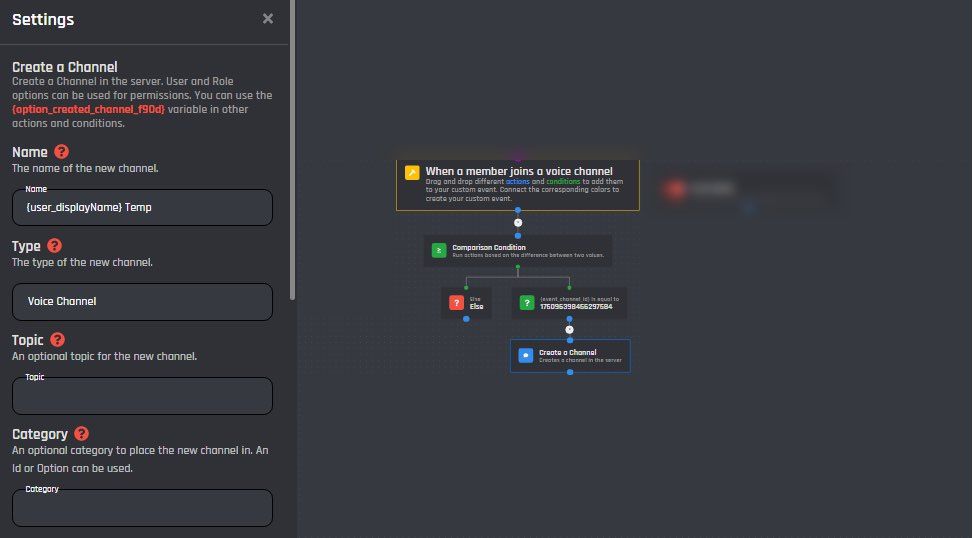
After configuring these settings, your 'Create a channel' block should resemble the provided configuration.
Next we need to move the user to the channel, this can be achieved by doing this:
Add a ‘Send API Request’ block and connect it to the create a channel block:
Name: move
Type: PATCH
HTTP HEADERS
Key: Authorization
Value: Bot {TOKEN_SECRET}
BODY REQUESTS
Key: channel_id
Value: "{channel_id[option_created_channel_xyz]}”
To get the correct value of ‘xyz’ you can refer to your create a channel block as shown below:

Temporary Functions
Now that the voice channel is created, it will move the user to it automatically with the APIblock. Next we need to make it update the total count for the voice channel. To do this follow the steps below;
Update User Count
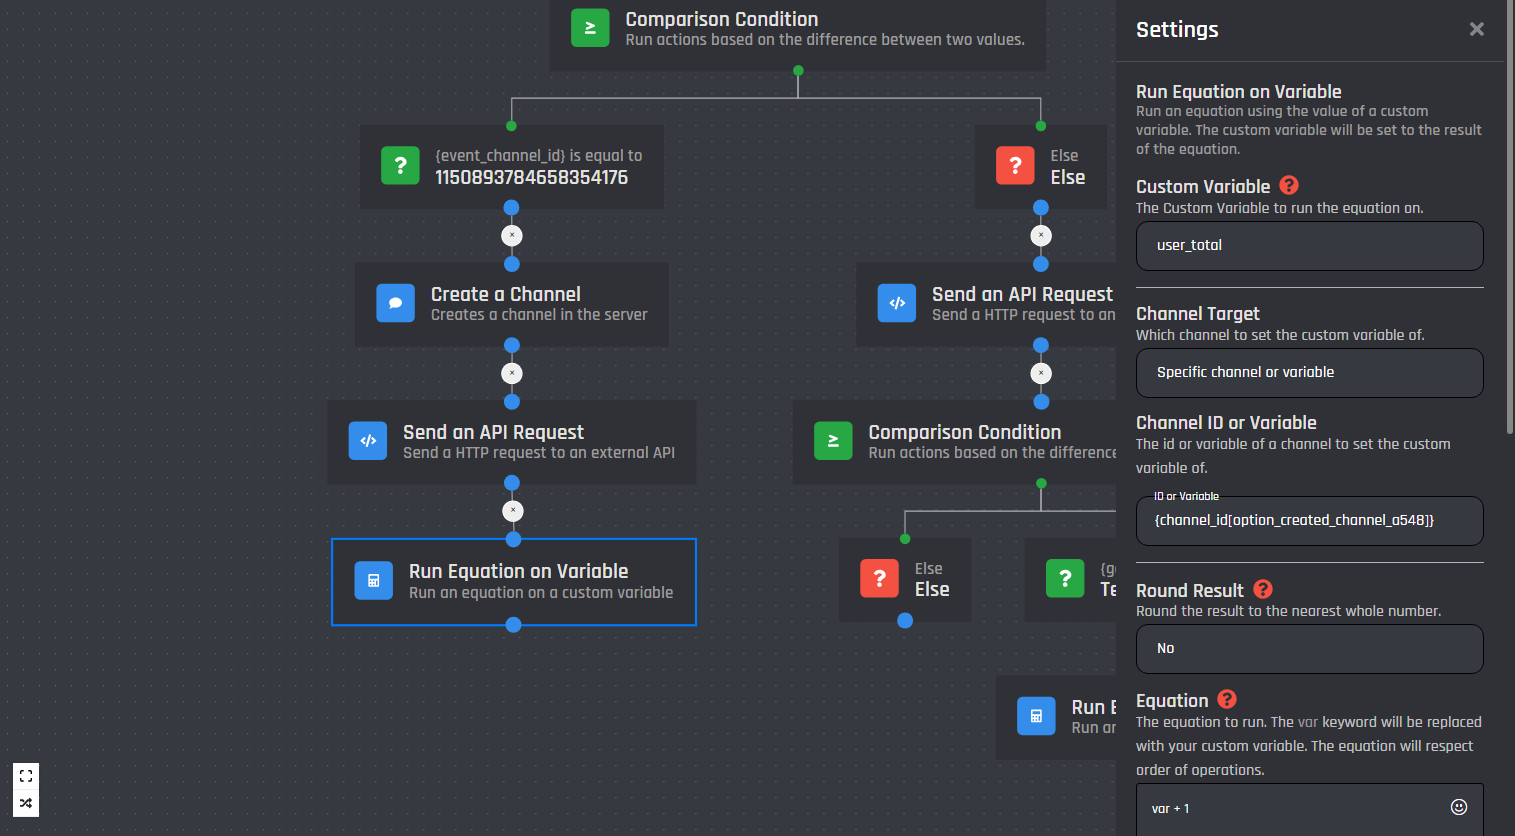
Below the 'Send an API request' block, add a 'Run Equation on Variable' block with the following settings:
Custom Variable: user_total
Channel Target: {channel_id[option_created_channel_xyz]}
Round Results: No
Equation: var + 1
With these configurations, the bot will automatically move the user to their newly created voice channel and increment the user count by 1. We can make it detect other users when they join by adding the following to the ELSE block (In the order they appear):
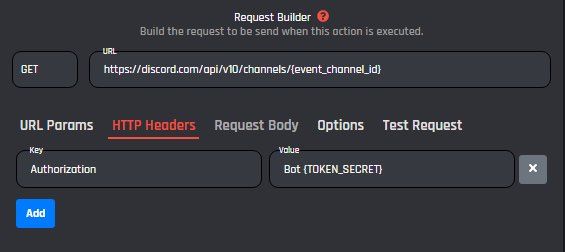
Get channel API
Name: GET
Request Type: GET
URL: https://discord.com/api/v10/channels/{event_channel_id}
HTTP Header
Key: Authorization
Value: Bot {TOKEN_SECRET}
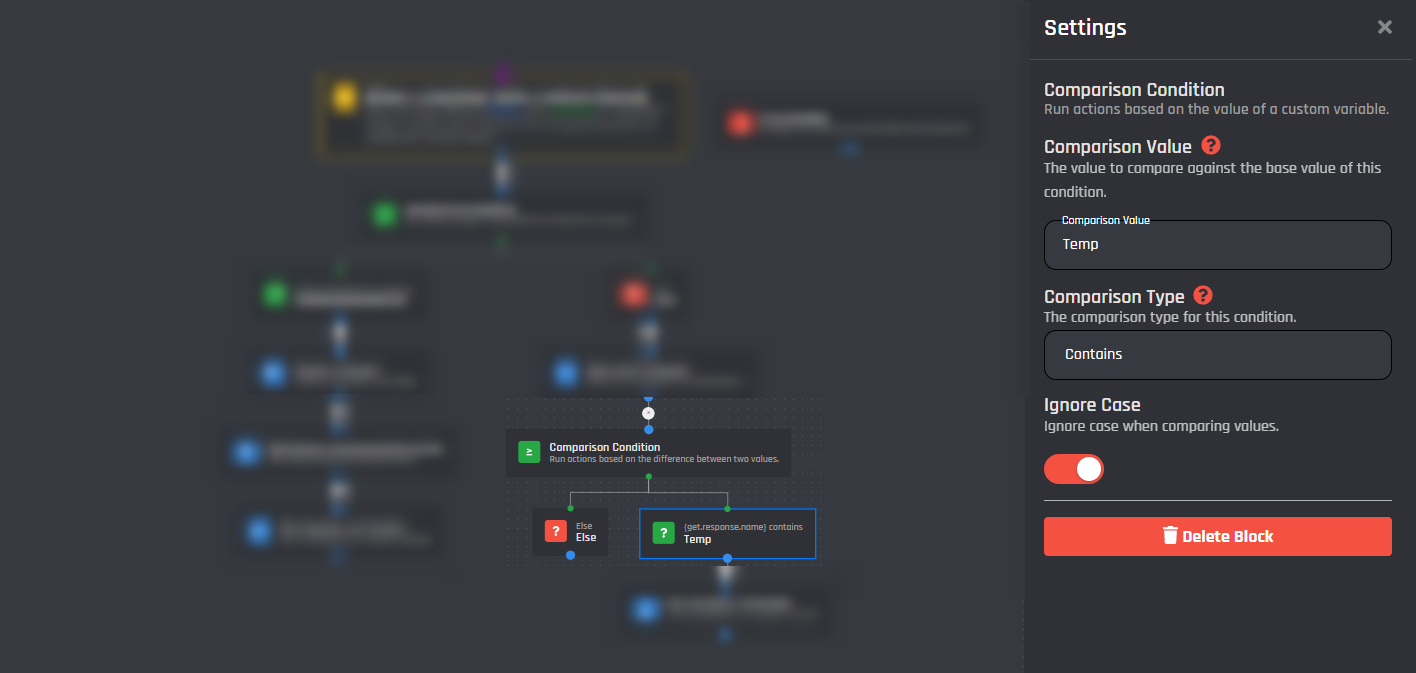
Comparison Condition
Base Value: {get.response.name}
Comparison Value: Temp
Comparison Type: Contains
Ignore Case: Enabled
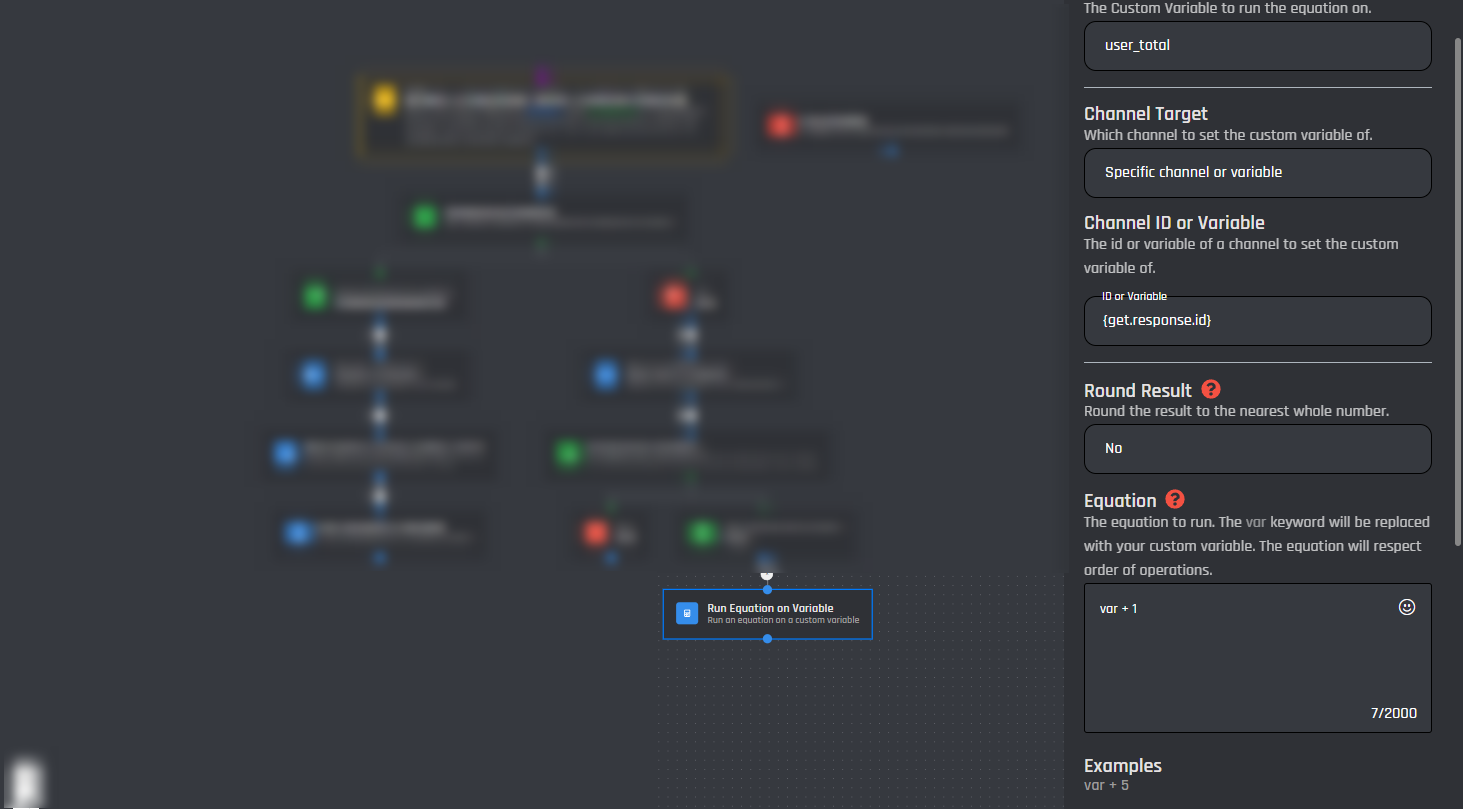
Run Equation on Variable
(Connected to the ‘TEMP’ condition [NOT ELSE])
Custom Variable: user_total
Channel Target: {get.response.id}
Round Results: No
Equation: var + 1
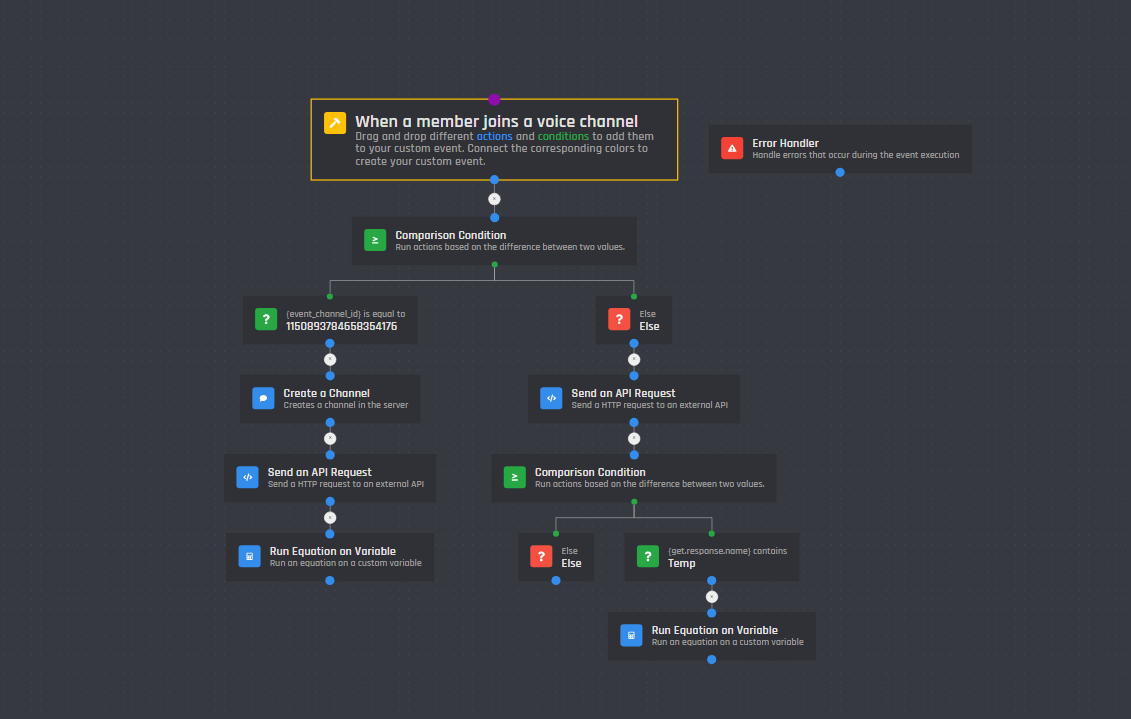
If you have followed this guide correctly, your join event should look like this:
Deleting the Channel When the Count Reaches 0
To automatically delete the voice channel when the user count reaches 0, we'll use the 'When a Member Leaves a Voice Channel' event. Follow these steps:
Access the 'Custom Events' Module
Return to the 'Custom Events' module
Initiate a New Custom Event
Click on the 'New Custom Event' box to open the event builder.

Select the Event Type
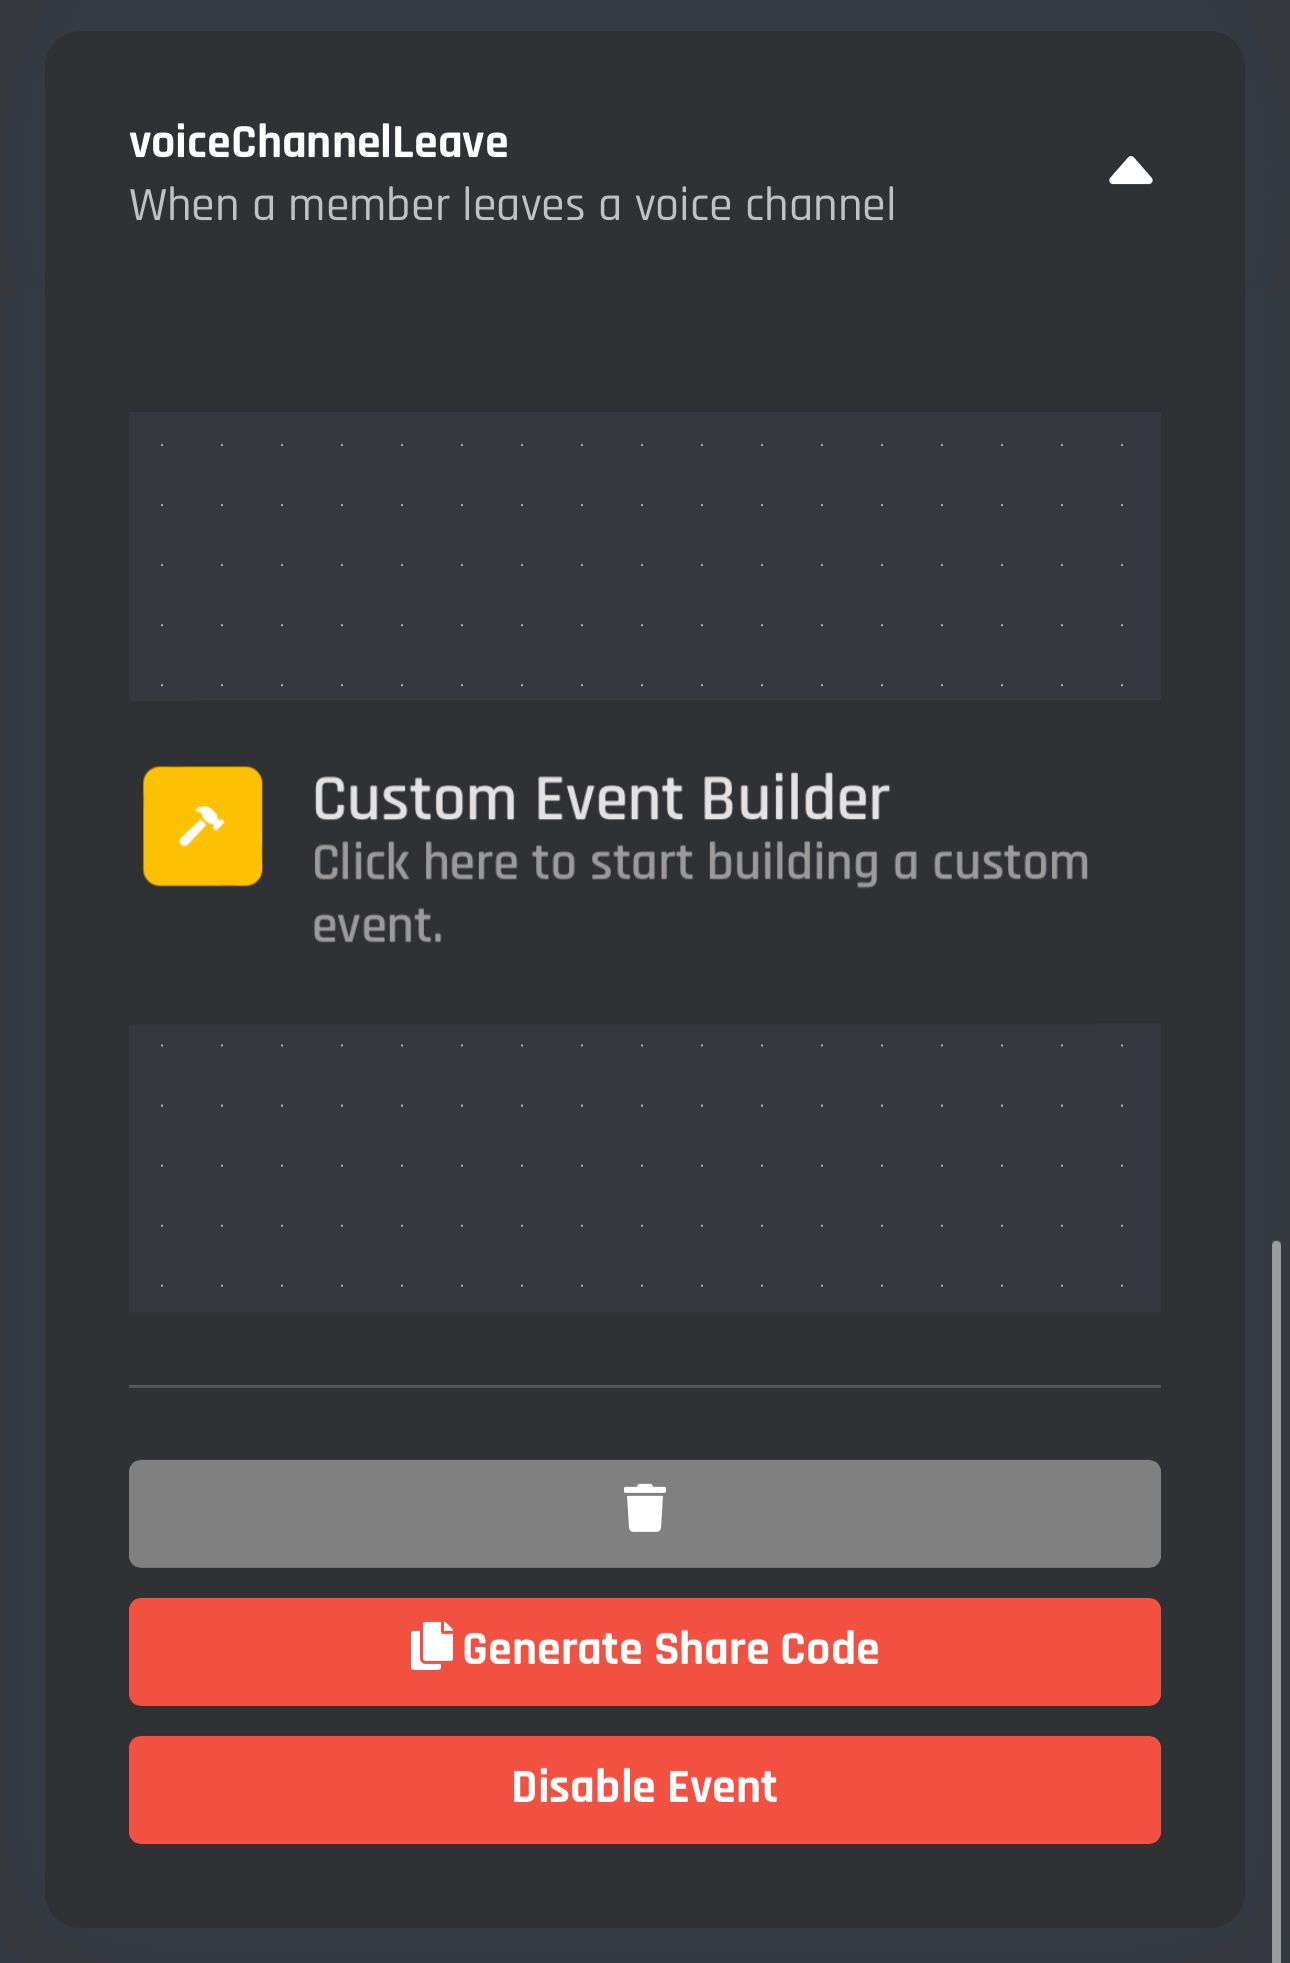
Choose 'When a Member Leaves a Voice Channel' from the event type list.
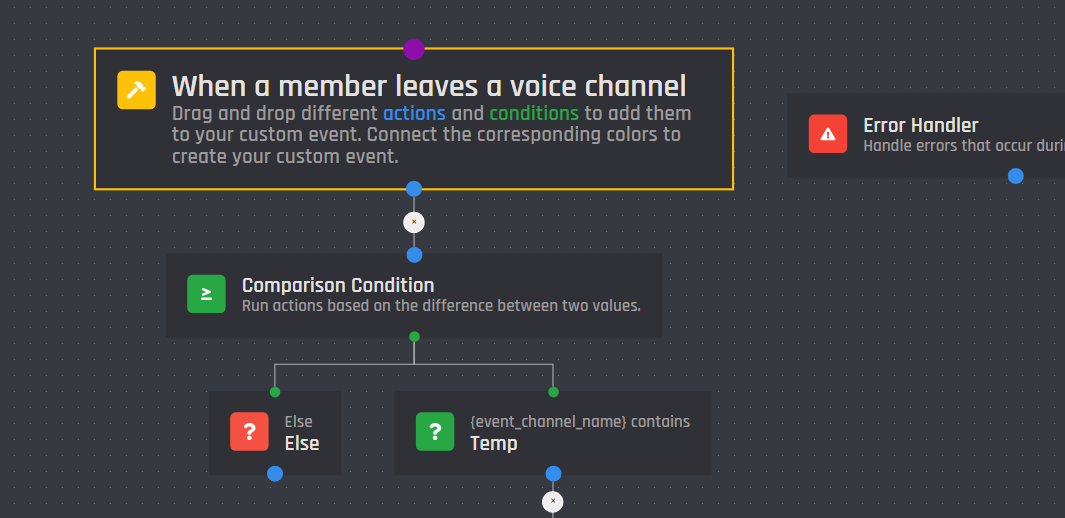
Set Conditional Logic
Add a 'Comparison condition' block at the start of the event with these settings:
Base Value: {event_channel_name}
Comparison Condition: Temp
Comparison Type: Contains
Ignore Case: Enabled
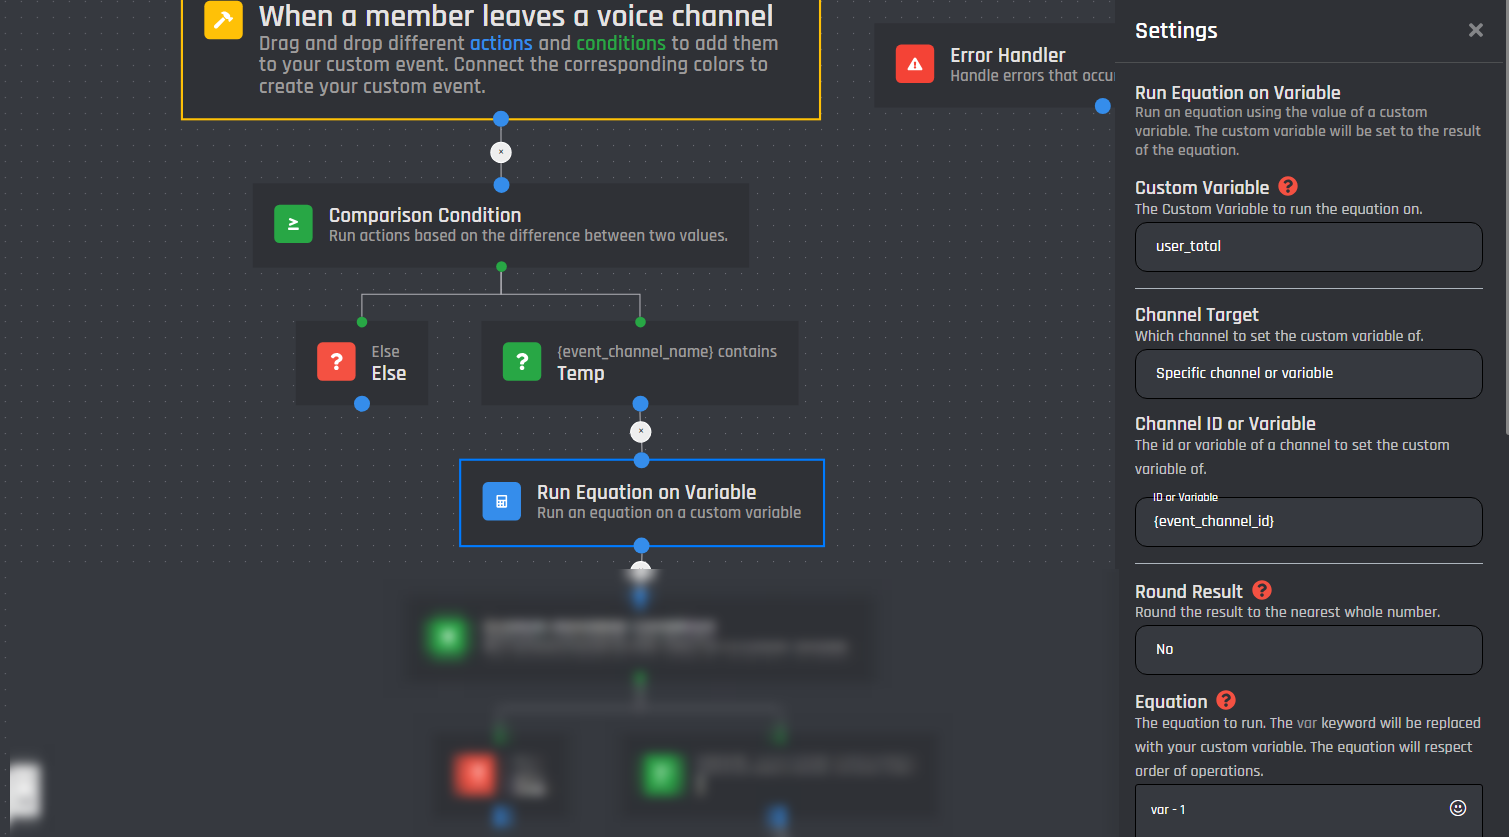
Update User Count on Leave
Below the 'Comparison condition,' add a 'Run Equation on Variable' block with the following settings:
Custom Variable: user_total
Channel Target: Specific channel or Variable
Channel ID or Variable: {event_channel_id}
Round Results: No
Equation: var - 1
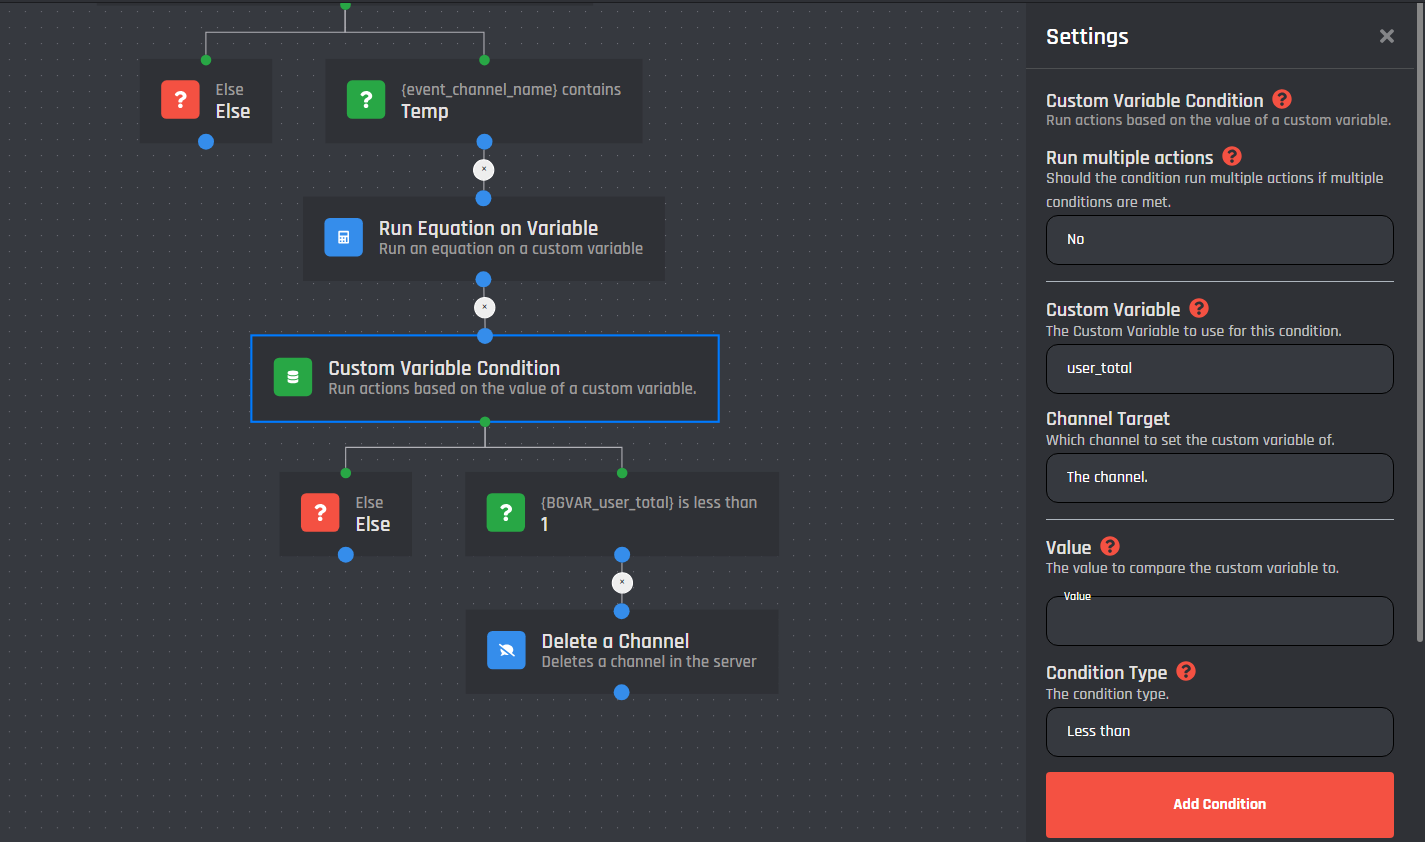
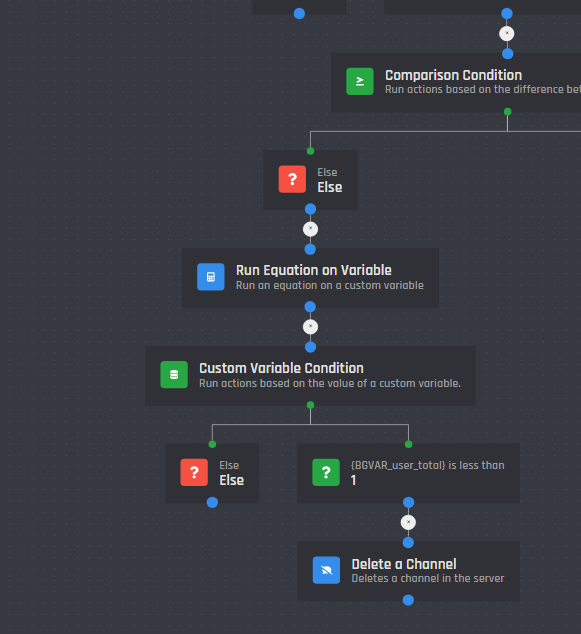
Check the count
Now we need to make the bot check the count to allow it to delete the channel if the count is 0. Use a custom variable condition with the settings as follows:
Custom Variable: user_total
Channel Target: The Channel.
Value: 1
Condition Type: Less Than
Delete the Channel
Finally, add a 'Delete a channel' block and connect it to the 0 condition value. Configure it as follows:
Channel: Channel ID or Variable
Channel ID or Variable: {event_channel_id}
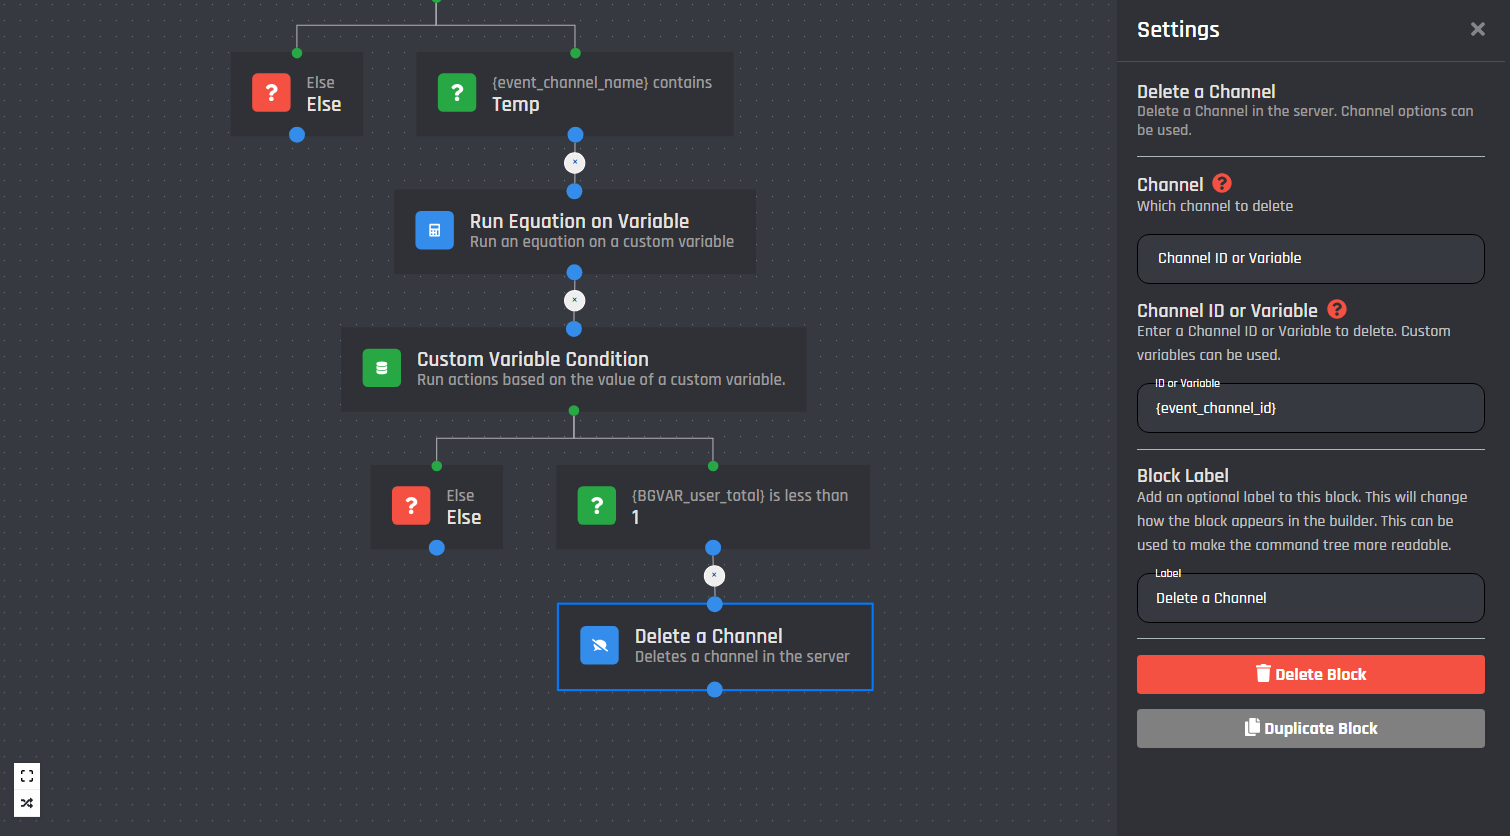
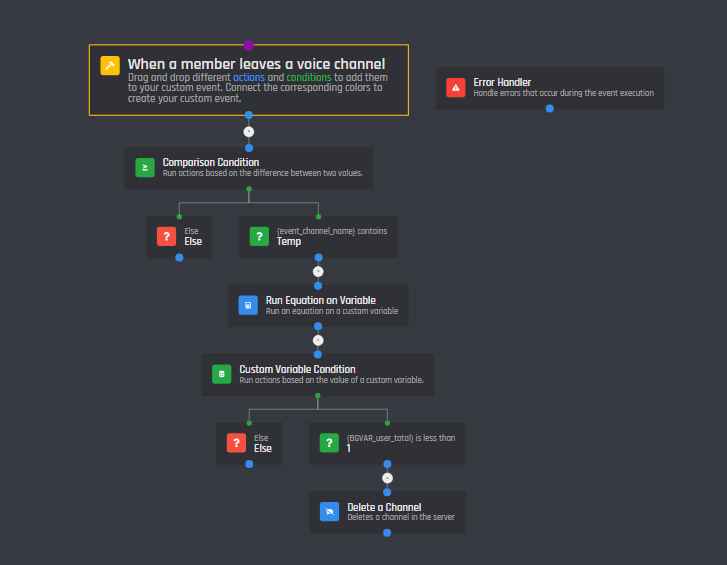
With these steps, the bot will remove 1 point from the user count every time a user leaves the temporary voice channel. When the count reaches 0, the channel will be automatically deleted.
Your leave event should look like this:
Voice Channel Switch Event
Now we have our leave event done, we can simply copy it’s share code and duplicate it to create our switch event. To do this, simply save the event. Then follow these steps:
- Head back to the events module
- Click the leave event and press ‘Generate Share Code’
- Hit the save button, then press copy share code
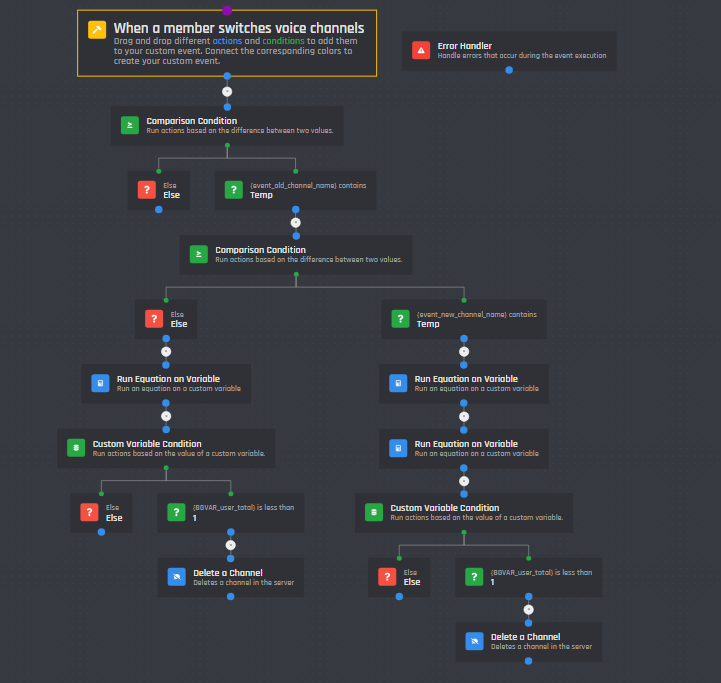
Next simply create a new event, instead of selecting a type, press the ‘Import Event’ button and paste the share code into the input field, once done press the ‘Import’ button and the event will be imported. All we need to do from here is change the event type and some values. To do this simply press the main event block (highlighted in yellow), then select the type and change it to “When a member switches voice channels”.
Now the event is imported, we need to change some stuff to make it work accordingly.
First change all {event_channel_name} variable to {event_old_channel_name} and all {event_channel_id} variables to {event_old_channel_id}.
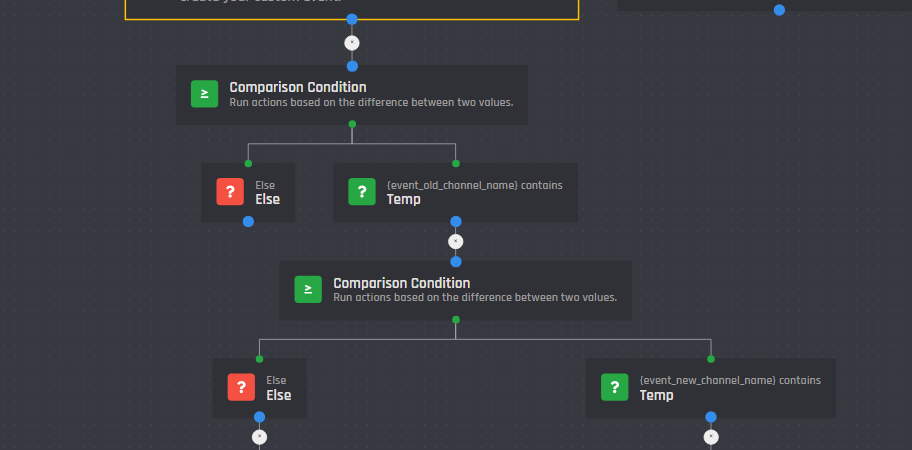
Once this is done we need to add a new comparison condition and connect it to the TEMP value on the pre-existing condition block like such:
Base Value: {event_new_channel_name}
Comparison Value: Temp
Comparison Type: Contains
Ignore Case: Enabled
Next, below this connect the extra blocks to the ELSE condition like such:
From here we can work on the TEMP value, to do this, we will group select the blocks on the else condition as pictured above and mass duplicate them. Once duplicated add a second run equation block and connect it above the first run equation block on the duplicated string like this:
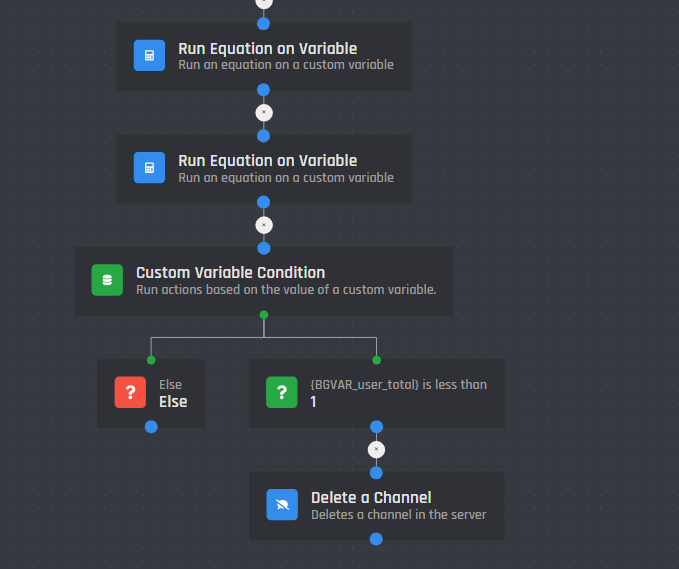
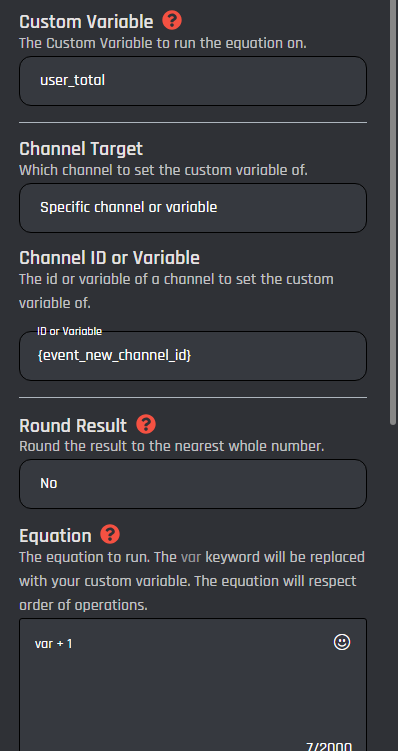
Inside the new run equation block, we will add the following:
Custom Variable: user_total
Channel Target: Specific channel or variable
ID or Variable: {event_new_channel_id}
Round Result: No
Equation: var + 1
With this being done the new event should be working perfectly! Take a look at what it should look like below:
Conclusion
Congratulations! You have successfully created a Temporary Voice Channel system using BotGhost. This system will enhance your Discord server's functionality and user experience by automating the creation and deletion of temporary voice channels. If you encounter any issues or have questions, feel free to reach out to the BotGhost community support team in our official Discord server: https://discord.gg/botghost.
Building a Discord bot can be complex, but with BotGhost and this comprehensive guide, you're well-equipped to manage your server's voice channels effectively. Enjoy the benefits of a cleaner and more organised server!
Written by

