Card Studio
Design image cards, like welcome cards, rank cards and profiles, and send them from any command or event.
Card Studio is where you design image cards: pictures with a member's name, avatar and anything else you add. Your bot draws the card and sends it in a message.
You can use cards in two places:
- The Welcomer, for welcome, goodbye and boost cards.
- The Make an Image Card block, in any command or event.
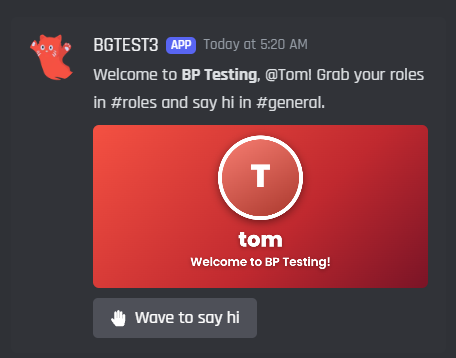
A card your bot sent
Make an Image Card needs Premium in your own commands and events. Cards in the Welcomer are free.
Send a card from a command
- 1
Add the block
Open your command in the builder. Under Actions, find Make an Image Card and drag it into your command.
- 2
Pick a design
Click the block to open its settings. Keep Design it here and pick a template, or press Open Card Studio to make your own.
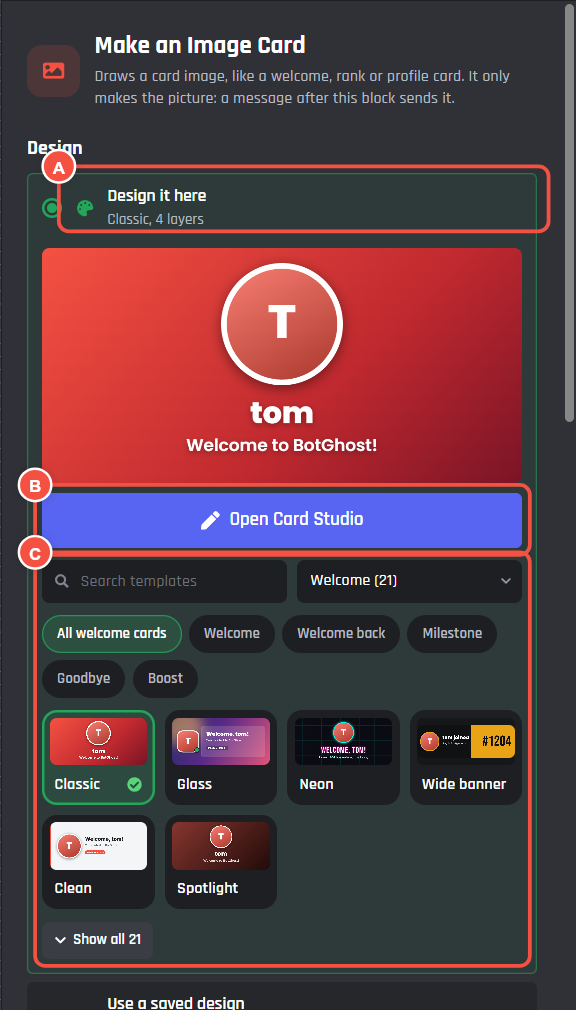
- A Design it here: the design is kept in this block.
- B Open Card Studio: change anything on the card.
- C Templates. Search them, or pick a type like Welcome or Goodbye.
- 3
Choose whose card it is
Scroll down to Whose card. Pick who goes on the card: usually the member who used the command, or a member by their ID.
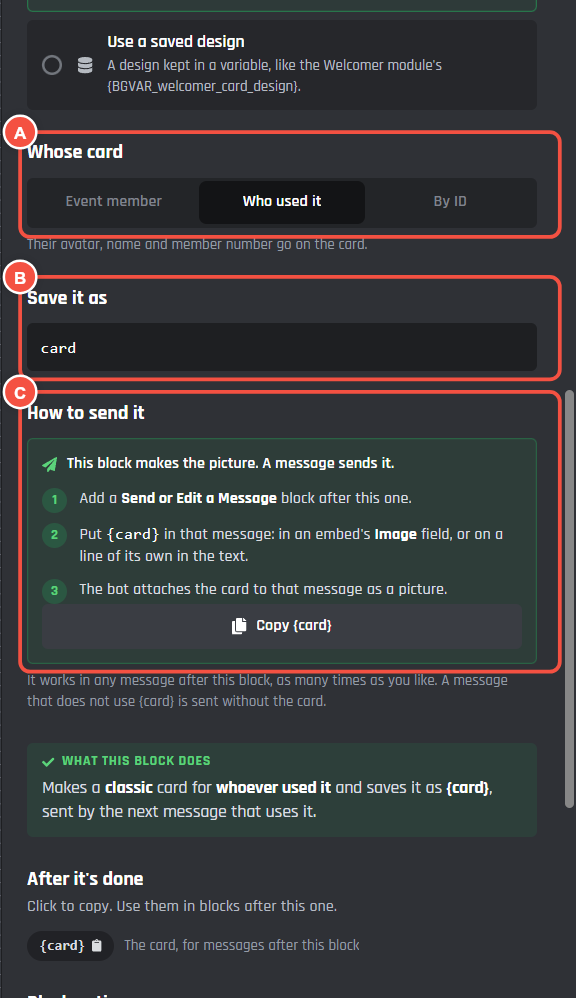
- A Whose card: whose avatar, name and member number go on the card.
- B Save it as: the name of the card.
cardgives you{card}. - C How to send it: the block makes the picture, a message sends it.
- 4
Send it in a message
Add a Send or Edit a Message block after the card block. Put
{card}in that message, either in an embed's Image field or on a line of its own.Press Copy {card} in the block's settings to copy it.
Making two cards in one command? Give each one its own name under Save it as, like
rankandbadge. Then use{rank}and{badge}.
Design a card
Press Open Card Studio to open the designer. Every change shows on the card straight away.
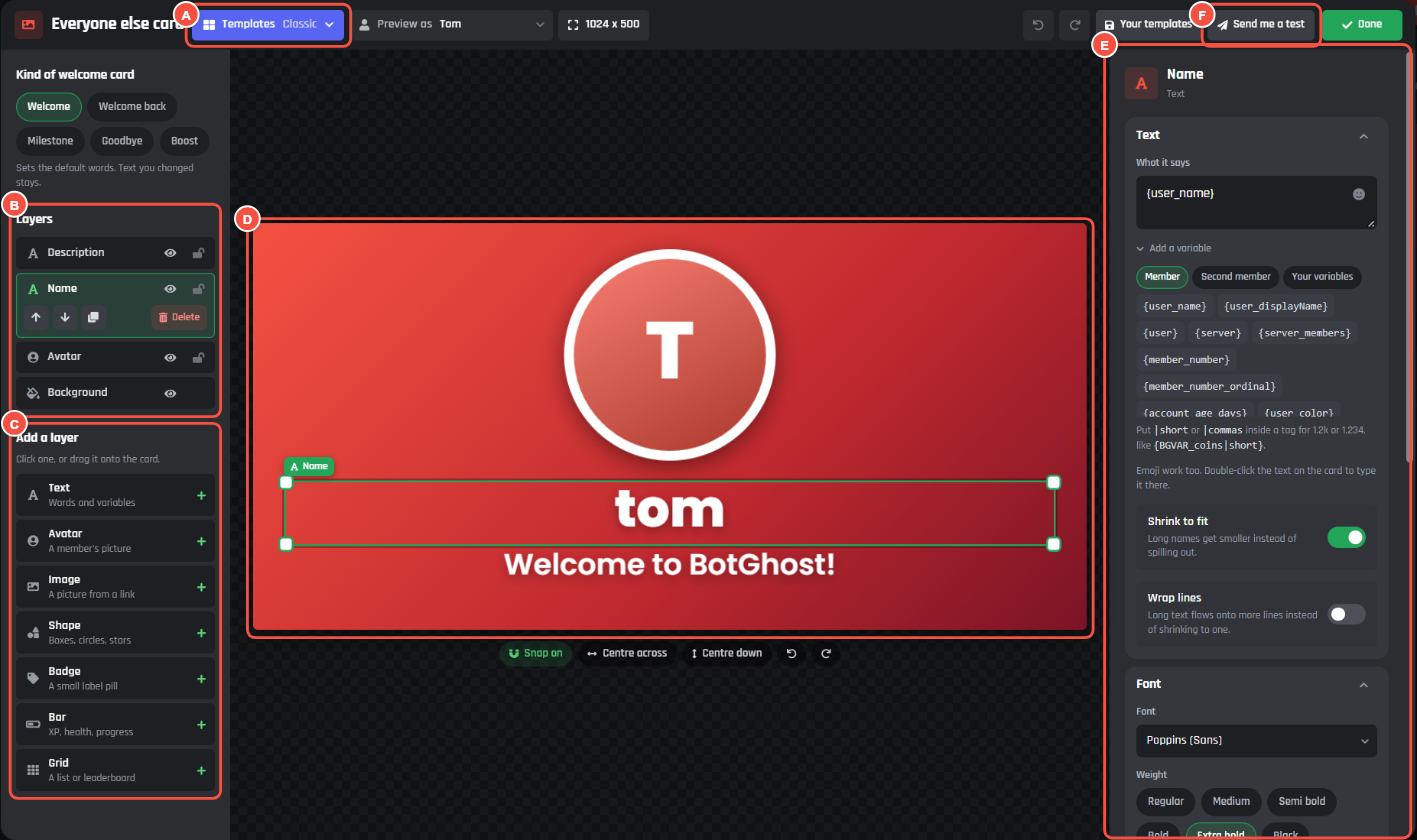
- A Templates: ready made designs to start from.
- B Layers: every piece of the card. Click one to change it, or press the eye to hide it.
- C Add a layer: text, an avatar, an image, a shape, a badge, a bar or a grid. Click one, or drag it onto the card.
- D The card. Drag pieces to move them. Double-click text to type on the card.
- E Settings for the layer you picked, like its text, font and colours.
- F Send me a test: your bot DMs you the card.
When you're done, press Done or click outside. Your changes are kept.
Put member info on the card
Text layers can use variables, like {user_name} or {member_number_ordinal}. Under the text box, press Add a variable to see them all.
Save your own templates
Made a design you like? Press Your templates at the top to save it, then use it on any other card.
Your own pictures
Image and background layers can use a picture from a link on any plan. With Premium, you can also upload pictures from your computer.
| Plan | Pictures you can keep | Space | Uploads a day |
|---|---|---|---|
| Premium | 25 | 50 MB | 15 |
| Priority Hosting | 100 | 250 MB | 50 |
Each picture can be up to 8 MB. Delete pictures you don't need under Your pictures to make room.