![How To Make A Discord Bot Without Coding [2022]](https://api-prod.usenotioncms.com/v1/proxy-2/block/f582eb8c-492a-42f8-af64-9107aa448126%2F7e828011-4db4-4b1c-8bb4-1b3758a7ea34%2Fmaxresdefault-1-1024x576.jpg)
Do not index
Creating a Discord Bot can be difficult if you have no coding knowledge. Discord bots can be found on virtually any community in discord performing a wide variety of functions. A Discord bot can help you do everything from moderating your server, playing music, posting Twitch updates, and welcoming new members.
This guide will teach you how to make a discord bot without any programming knowledge using BotGhost.
How to make a Discord Bot with BotGhost

BotGhost is a free no-code discord bot creation and hosting tool. BotGhost uses your Discord Bot's token to take control and run your bot for you, without any coding. Over 900,000 bots have been created to date, with hundreds of thousands of people interacting with these bots every single day.
At the end of this guide, you will have a simple online discord bot hosted with BotGhost, which you can then customize for your individual needs.
Step 1: Create an Application on Discord
The first step in making any discord bot is to create an application in the Discord Developer Portal. The goal is to get a Bot Token which you will use to connect your bot application to BotGhost. BotGhost then uses this token to take full control and run your bot for you.
Log in to Discord and head over to the Discord Developer Portal and click the New Application button at the top right of the page.

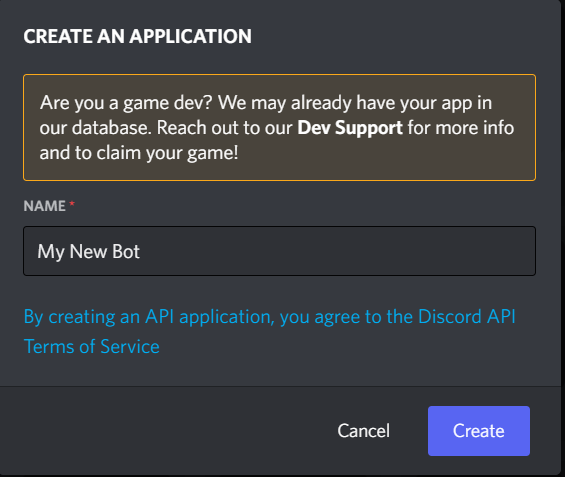
Next, give your Application a descriptive name. This name will be different from your Bot's username, which you can change later both in your BotGhost dashboard and in the Discord Developer Portal. Finally, click the Create button to create your application.
You will then be bought to the Applications General Information tab. From this page, you can see your bot's application ID and fields to input the application's name, description, tags, and icon. These fields aren't entirely important for your bot and relate only to the Discord Developer Application.
Step 2: Converting to a Bot Application
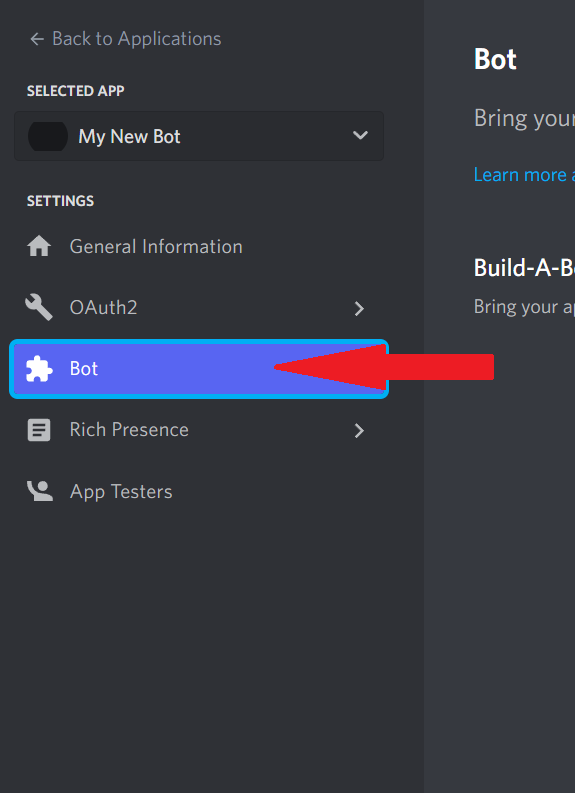
In order to make a discord bot, you must turn your newly created Discord Application into a Bot Application. To do this, head over to the Bot page by clicking on the Bot tab on the left side menu.
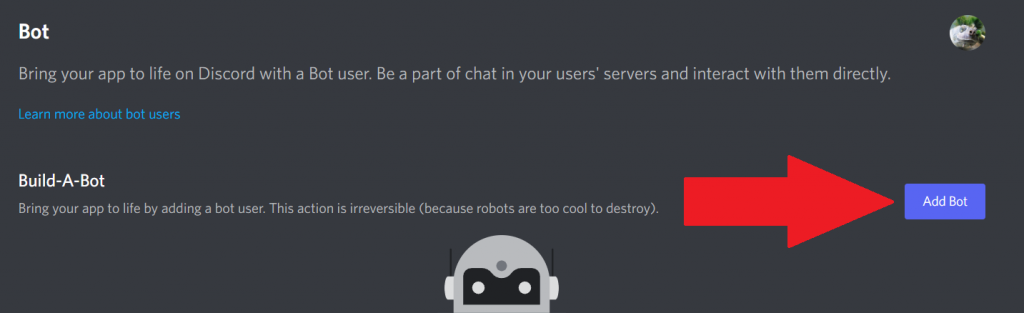
This will bring you to the Bot Tab in the Discord Developer Portal. From here, you will need to click the Add Bot button to create your Discord Bot.
Finally click the Yes, do it! button to confirm and move on to the next step.
Step 3: Generating a Bot Token
This new page houses all the important information about your new Discord Bot. From here you can set the actual display username and icon of your bot, change whether this bot should be public or private, and most importantly, generate your bot's token.
On this page, click the Reset Token button to regenerate your bot's token. This will allow you to copy a new bot token which you will need to connect your discord bot to BotGhost.
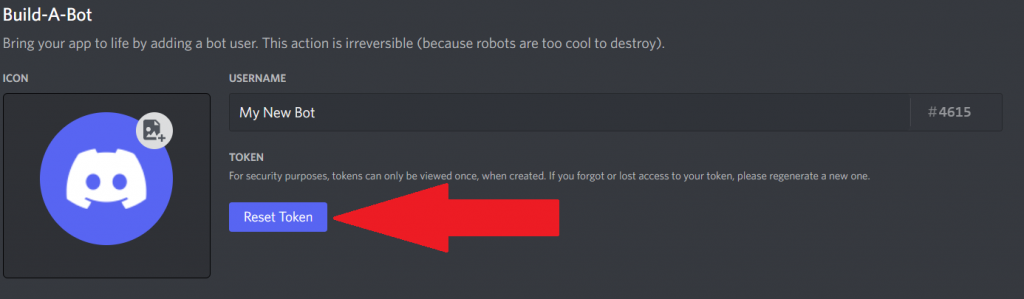
Once again click the Yes, do it! button to continue. This will reveal your bot's token and a Copy button. Copy your bot's token and write it down somewhere as you will need it for the later steps.
Make sure never to leak or give another person your Bot's token, as this will allow them to take full control of your Discord Bot. If you ever need to reset access to your bot, click the Reset button and repeat the steps from above.
Step 4: Enabling Privileged Gateway Intents
Discord has recently required bots to opt into which information they need to receive in order for their bot to function. There are currently three Privileged Gateway Intents:
- Presence Intent
- Server Members Intent
- Message Content Intent
Different functions of your bot will require different intents to be enabled. For example, the Server Members intent allows your bot to receive updates related to guild members, so any module or function that relies on member events will not work correctly if this intent is not enabled.
If you do not have any intentions of having your bot verified, you can enable all three privileged gateway intents. If your bot reaches 100 or more servers, however, you will need to disable any intents that you do not require.
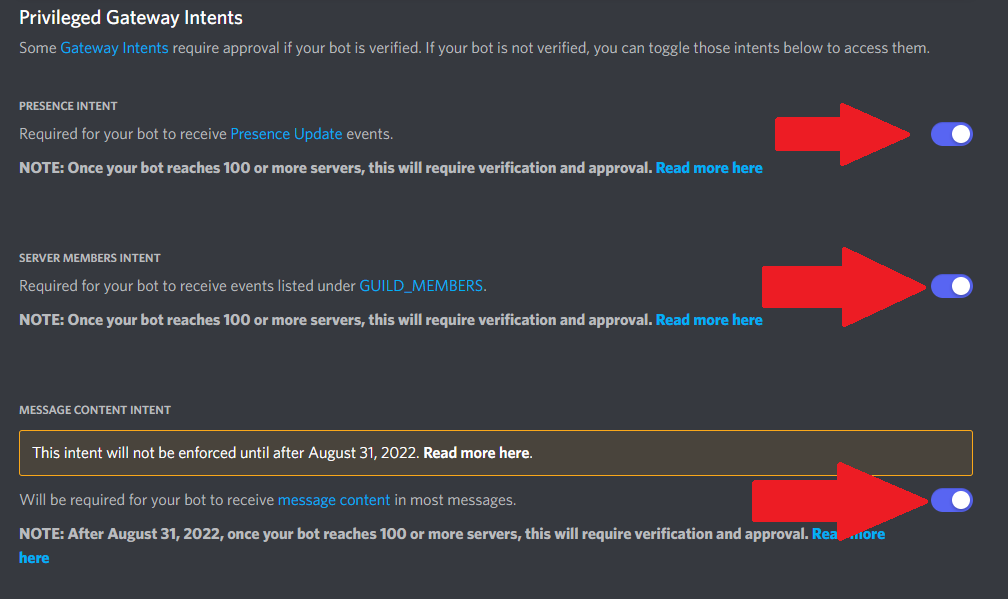
Save these changes by clicking the Save Changes button that will appear. It is very important that you DO NOT enable Requires OAuth2 Code Grant. Enabling this option will mean you will be unable to invite your bot.
You are now ready to link your newly created Discord Bot to BotGhost.
Step 5: Linking your bot to BotGhost
Now that you have created your Discord bot's token and enabled privileged intents, it's time to link your bot to BotGhost. BotGhost uses the token you just generated to take control of and run your bot for you, without any coding.
Head over to the BotGhost Dashboard and log in if you have not already. You should then be redirected to the New Bot setup page. If you have used BotGhost in the past you can get to this page by clicking here.
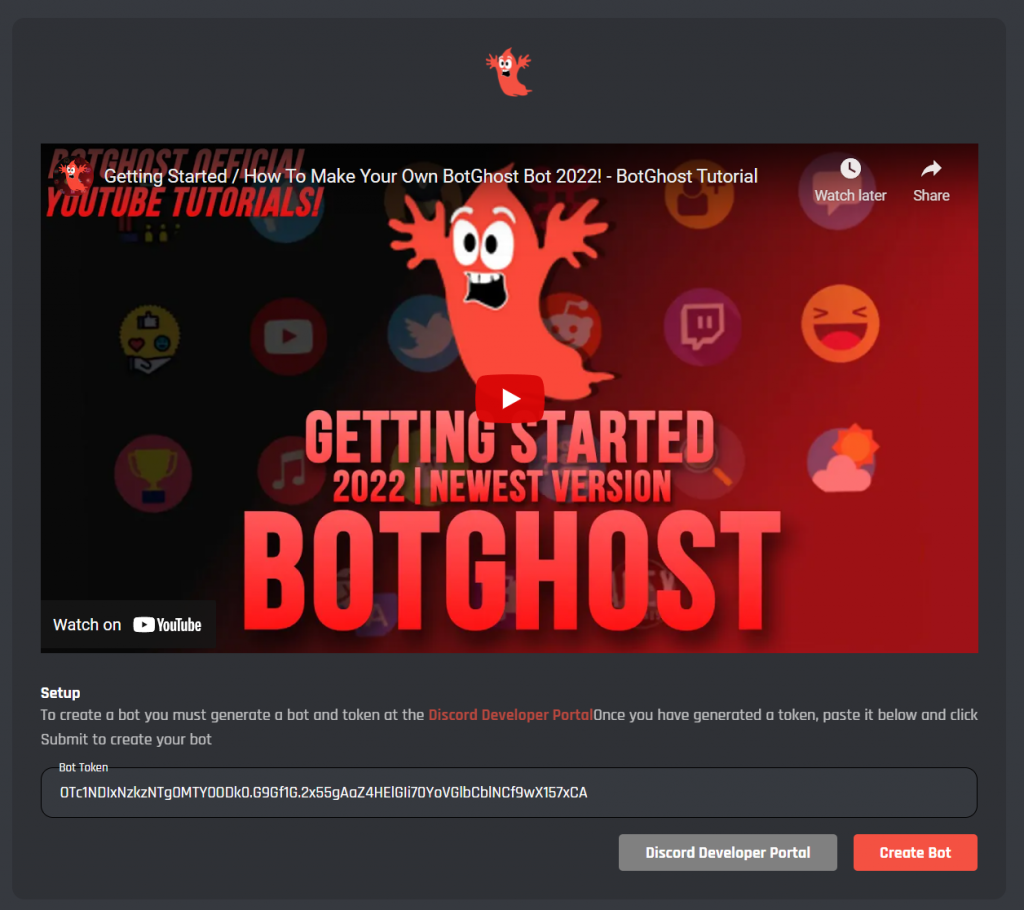
Paste your bot's token into the Bot Token input to link your discord bot to BotGhost.
Finally, click the Create Bot button to link your Bot to BotGhost. BotGhost will then take control of and log into your bot. You will then be redirected to the BotGhost dashboard, where you can create your own custom commands, or enable prebuilt modules.
Step 6: Inviting your Discord Bot
The final step in creating your own discord bot is to invite your newly created bot to your Discord server. BotGhost uses slash commands for its modules and custom commands which require special permissions which must be granted when inviting your bot. The best way to ensure that these are granted is to use the invite link provided in your BotGhost Dashboard.
To do so, simply click the Invite button in the main menu in the dashboard.
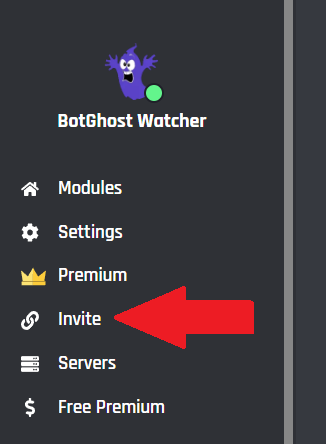
This will open up a new tab in which you can select the server you want your bot to be added to. Make sure that the required permissions are selected otherwise your bot will not run correctly.
Wrapping Up
Congratulations. If you have followed along correctly you should have a simple bot up and running that is in your discord server. You can type / to get a list of commands and enable more modules in your BotGhost Dashboard. Be sure to check out our YouTube Channel for specific guides on how to create custom commands for your bot.
![How to Make an AI GPT3 Question and Answer Bot on Discord using BotGhost & OpenAI [API Guide #2]](https://api-prod.usenotioncms.com/v1/proxy-2/block/dfb0dbb0-234d-4ef7-a2c2-7e1376d1c376%2F5d25f6a0-29ed-438c-a790-cb29c284e51c%2FUntitled1_13.png)
